This short guide is to show you how to repeat certain row headers or columns when printing. For those of us who spend ages getting a table “just right” on screen, then it goes pear shaped when you print it off 😉
First off, in Excel 2007:-
Below is an example of a table that I want to print off – on screen it’s fine as I’ve frozen panes so the headers are always visible (if you want to know how to do that, click here)
However, when I go to Print Preview it looks a mess – even after I’ve set the page layout to how I want it…
Pages 2 and 3 of the preview don’t really show us what they correspond to, so how do we get the headers to repeat?
Firstly go to Page Layout in the Ribbon and select Print Titles in the Page Setup section. If you hover over the Print Titles button, a description pops up to explain what it does…
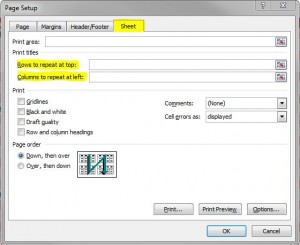
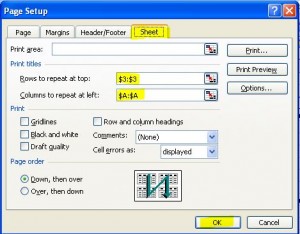
A dialogue box opens where you can choose the rows to repeat at top and/or columns to repeat at left…
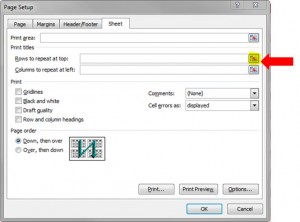
Click on the little box (technical term :)) on the right…
Then choose the row you want to repeat – in this example we want to repeat the table headers so it will be row 3.
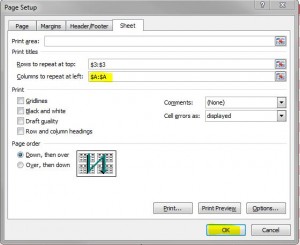
Click back on the “small box” and it will take you back to the dialogue box, repeat the same method for choosing a column to repeat, for example column A, and click OK…
You’ll not notice any difference on the actual spreadsheet, but if you now go back to print preview, you should see that the table header and the 1st column are now repeated on each page – below is page 3 in print preview…
And that’s how you repeat rows / columns when printing 🙂
Excel 2003
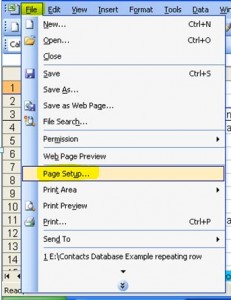
In the 2003 version, the only difference is that you don’t have the ribbon. So, click on File on the toolbar, and go to Page Setup
This will bring up the exact same dialogue box as in 2007, just make sure that the Sheet tab is selected, and follow the same steps as above…
And you’ll have perfect looking printed tables 🙂


