Footnotes are a great way of explaining something in detail without interrupting or taking the reader away from the actual main body of text. They’re also good for crediting sources. This quick tutorial shows you how to insert footnotes into a document in Word 2010.
Firstly position the cursor where you want the footnote to be referenced, click References in the ribbon and Insert Footnote…
This drops you down to the end of the page for you to type out the actual footnote; a separator bar automatically appears above the footnote. If you want the text in a different colour or size, highlight the text & change as you would normally…
KEYBOARD SHORTCUT: Press Ctrl+Alt+f to insert a footnote
Word remembers the numbering so the next footnote you insert will automatically be the next number…
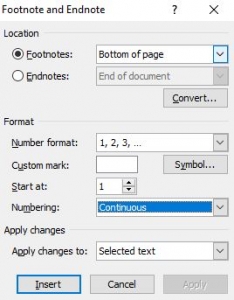
To change the sequencing of the footnotes, click on the expansion arrow in the bottom right corner of the Footnotes section on the ribbon, and this will open up the dialogue box…
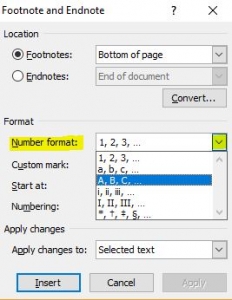
Here you can change the number format…
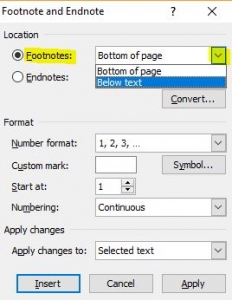
…the position of the footnote…
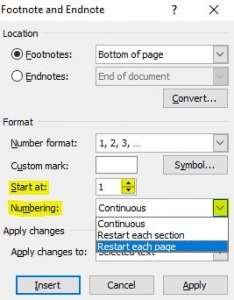
…the starting number, and whether you want continuous numbering or not…
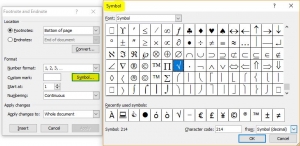
If you don’t want to use numbers at all, click on the Symbol button and you can choose a symbol instead…
If you want to see what the footnote is in the main text, hover over the number and it will show you…
To remove the footnote, simply go to the number in the main body of text & delete it.


