Working as a Virtual Assistant means I can work with clients all over the world, which can be a bit confusing when it comes to arranging phone calls / Skype meetings! I recently came across a fantastic tool within Google Calendar that allows you to select different timezones – ideal if your business deals with clients in different locations. This tutorial shows you how to find it – I hope you find it as useful as I have 🙂
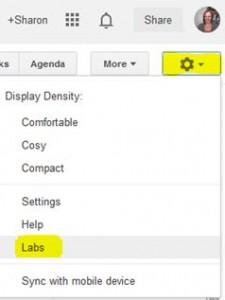
Firstly, log into your calendar within Google, and click on the cog in the top right corner and select Labs…
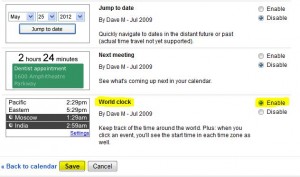
This will bring up a selection of testing features which are there to help you get more out of Google. Scroll down to one called World Clock, tick Enable and click Save…
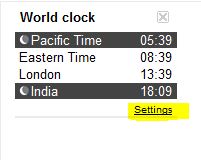
You will now have a new section appear on the right hand side of your calendar called World Clock. This is automatically defaulted to show the time for Pacific, Eastern, London and India. To change what time zone you want to see, just click on Settings…
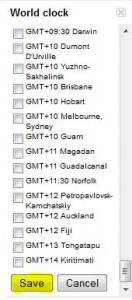
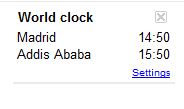
This will open a list of different timezones, just go through the list and tick / untick the ones you want to see. For example one of my clients does a lot of training in Ethiopia, so I’ll tick Addis Ababa so I know what time it is when I email her. Once you’ve made your selections scroll down to the end of the list and click Save…
Your selection now shows on the right hand side. When you click into the calendar to arrange an appointment, the world clock is still visible on the right hand side making it very handy to see the timezones relevant to you…
And that’s it, an extremely useful way of knowing the different timezones for when you’re booking meetings etc. If at any point you don’t want this feature, just go back into Labs and click Disable next to World Clock.
It’s a good idea to keep checking into the Labs section of the Google calendar as the list changes as and when new features are added so it’s worth seeing what else you might like the look of 🙂

