The expenses table for one month is now complete 🙂 But what’s the point of having it just for 1 month? Surely it would make more sense to have a table for each month in the same workbook?
You’ll notice how Excel automatically has 3 sheets on view at the bottom of the page whenever you open a spreadsheet – named Sheet1, Sheet2, Sheet3.
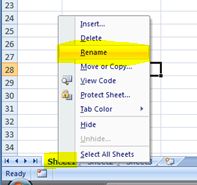
We want to have a tab for each month, so the first thing we need to do is rename the sheet. To do this, you can either double click on the Sheet1, so it becomes highlighted, then just type in the new name, or you can right click on Sheet1 and choose rename. Both ways work the same, it’s up to you which you find easier.
Call this tab the month your table refers to (in this case March), so next we want to copy the exact same table to the next tab ready for the next month. You might think its just a matter of highlighting the table & copying (Ctrl+C), then pasting (Ctrl+V) into a new sheet – this would work fine if you just want the table. However, this way does not guarantee that all of the formatting will be copied as well (i.e. print layout, centre alignment etc)
There is another way…
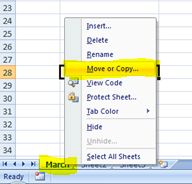
Again right click on the tab name (March) and choose Move or Copy…
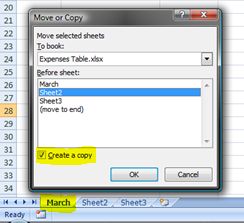
This allows you to move the sheet to a different position within the open workbook, or to another open workbook, or to a completely new one. Or you can create a copy and choose it’s location (same as moving). Click on Create a copy and click Sheet2 – this will put the copy before the tab Sheet2 i.e. straight after March.
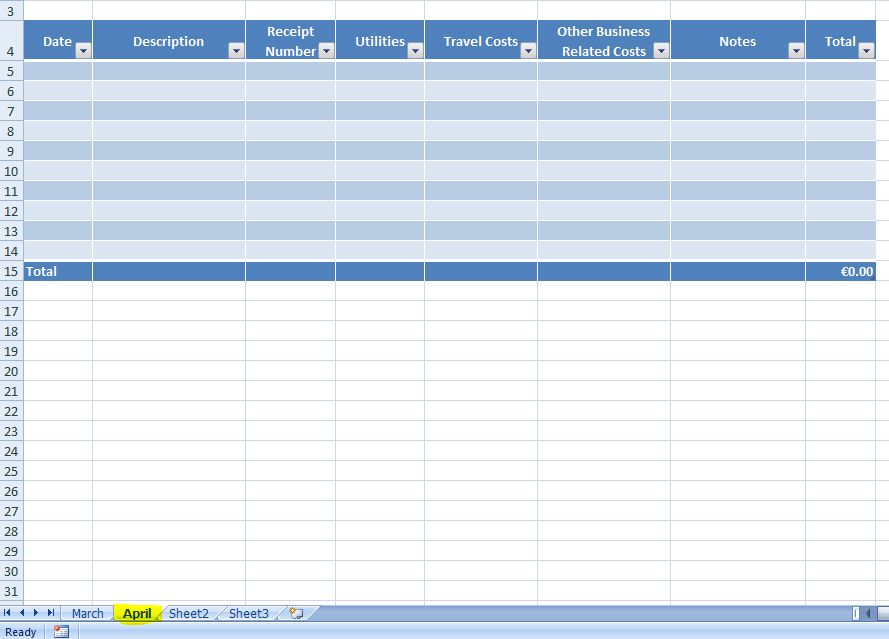
So, now you’ll have 2 tabs called March and March (2) – both with identical tables & formatting (including print layout). Rename March (2) with the next month, and delete the data within the table so it’s ready for entering information.
Now you can do the same with the blank sheet (April) – right click – move or copy – create a copy – place after previous month – rename that tab, until you have the whole year ready for you to fill in with your expenses 🙂
If you want to remove the 2 tabs called Sheet2 & Sheet3 then just right click on each tab and choose delete.
If you want to add a new worksheet, click on the last tab as per below.
If you didn’t catch the series from the start, click here to go to part 1.
I hope you’ve found this series helpful – if you have any questions or feel I’ve missed something out, please feel free to leave a comment 🙂


